How to make a flag display case? is a very popular question in United States because many Americans want to show their love, respect and loyalty to their country by displaying a flag in a gorgeous flag display cases
Flag display cases are used to preserve and exhibit an heirloom or keepsake which belongs to a deceased veteran or a special occasion to cherish the memories. It is easy to find flag display cases with just one click online, but you can also make one for yourself at home.
In this post, we present the plans for a flag display case and build a flag display box on your own.
What Are the Necessary Tools for Building A Flag Display Case?
It would help if you had several tools to build a flag display case:
- A chop saw (Miter saw)
- A power drill
- Tape Measures
- Glue
- A Pen
- Finishing Nails
- Rabbet Bit
- Sandpaper (from 100 up to 250)
- Dry Cloth
- Varnish
- Tape
- Glass cutter
- Small hammer
As can be seen above, power tools and sharp objects need to be used in this project. Thus, you need to have the necessary experience, security tools, and equipment to to overcome making a flag display case project.

What Are the Necessary Materials for Building A Flag Display Case?
Before collecting the required materials, it is necessary to decide the size of the flag display case you want to build.
Thus, finish the folding of your flag before starting the building a flag display case and make sure that the interior dimension of the flag box matches the dimensions of the folded flag. As for the materials that are needed:
- Hardwood
- Plywood
- Glass
You can also use the materials at your home for this project, but do not forget to sand the hardwood to remove its former paint and dust.
Steps for Building A Flag Display Case
After gathering all the materials and tools that are needed to build a flag display case, you can move on to the building process:
Step-1
Cut three hardwood pieces at the appropriate size with a folded flag. Bevel the edges of all three pieces at precisely 45° using the chop saw.


Step-2
Rout rabbets lengthwise at both edges of the hardwood pieces. The rabbet, intended to be at the front, must be at the same width as the glass.

Step-3
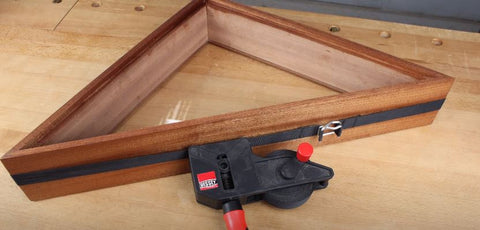
Miter the pieces on an even table to form neat joints and put some glue between them. Make sure the rabbets perfectly match. Then tape them together and wait for them to dry.

Step-4
Drill two small holes about the size of the nails at the frame corners and gently drive the nails into the holes to strengthen the joints.
Step-5
Cut out a thin plywood piece of the same size with the interior dimension of the flag case. Furthermore, the backing must have the same depth as the rabbet.
Step-6
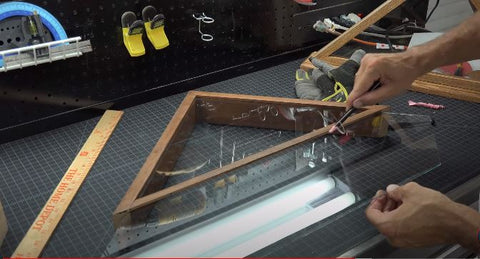
Do the same thing with the glass with a glass cutter. Then, put a line of glue all through the rabbet and place the glass neatly on it. Stick it carefully and wait for it to dry.

Step-7
Place the flag into the display case and place the backing by sticking it with the glue.

Step-8
Sand all the wooden parts with the sandpapers starting with 100 and continue until 250.

Step-9
Finish your project by applying the varnish on the wooden parts and leave it dry.

If you making a flag display case and it takes longer and you need extra tools, then you can also prefer to buy it.
How to Fold a Flag For a Display Case?
- Before folding the flag, place it horizontally on a waist-level table.
- Fold the stripe section lengthwise over the starry part.
- Fold the flag lengthwise again but make sure that the starry section stays outside.
- Make a triangular fold at the striped end and fold this part in parallel to the open edge.
- Repeat this until the end of the flag and creating a starry triangle.
Where to Buy Flag Display Cases?
Decomil Store is the easiest way to buy a variety of flag display cases. We make ordering processes smooth, fast, and easy.
To buy flag display cases and to grab the latest discount offer, visit our website https://www.decomil.com/


Dejar un comentario
Este sitio está protegido por hCaptcha y se aplican la Política de privacidad de hCaptcha y los Términos del servicio.